Rummikub
Rummikub is a family favorite around here, being suitable for all ages and allowing up to four people to play at a time. As the holiday break comes to a close, I wanted to write a post about this game and its intersection with 3d printing, a hobby of mine.
The Game
The Wikipedia link above does a great job describing the game. For the purposes of this article, there is one main aspect of the game which is relevant to 3d printing: the tray design. Games start by drawing 14 tiles, and cannot start playing tiles until they have drawn sufficient tiles that they can make “melds” (runs or sets of 3 or more tiles) worth at least 30 points in total. This leads to a few requirements on the tile holder:
- Three rows vs. two provides more flexibility for initially arranging the tiles by color or numerical value.
- Total capacity must be in the neighborhood of 30 tiles or more, since it is common to draw many tiles before you can play. So for 3 rows, we’d want horizontal space for 10 or more tiles.
- The tiles must be easy to grab, insert, and remove from the tray.
Tray Design
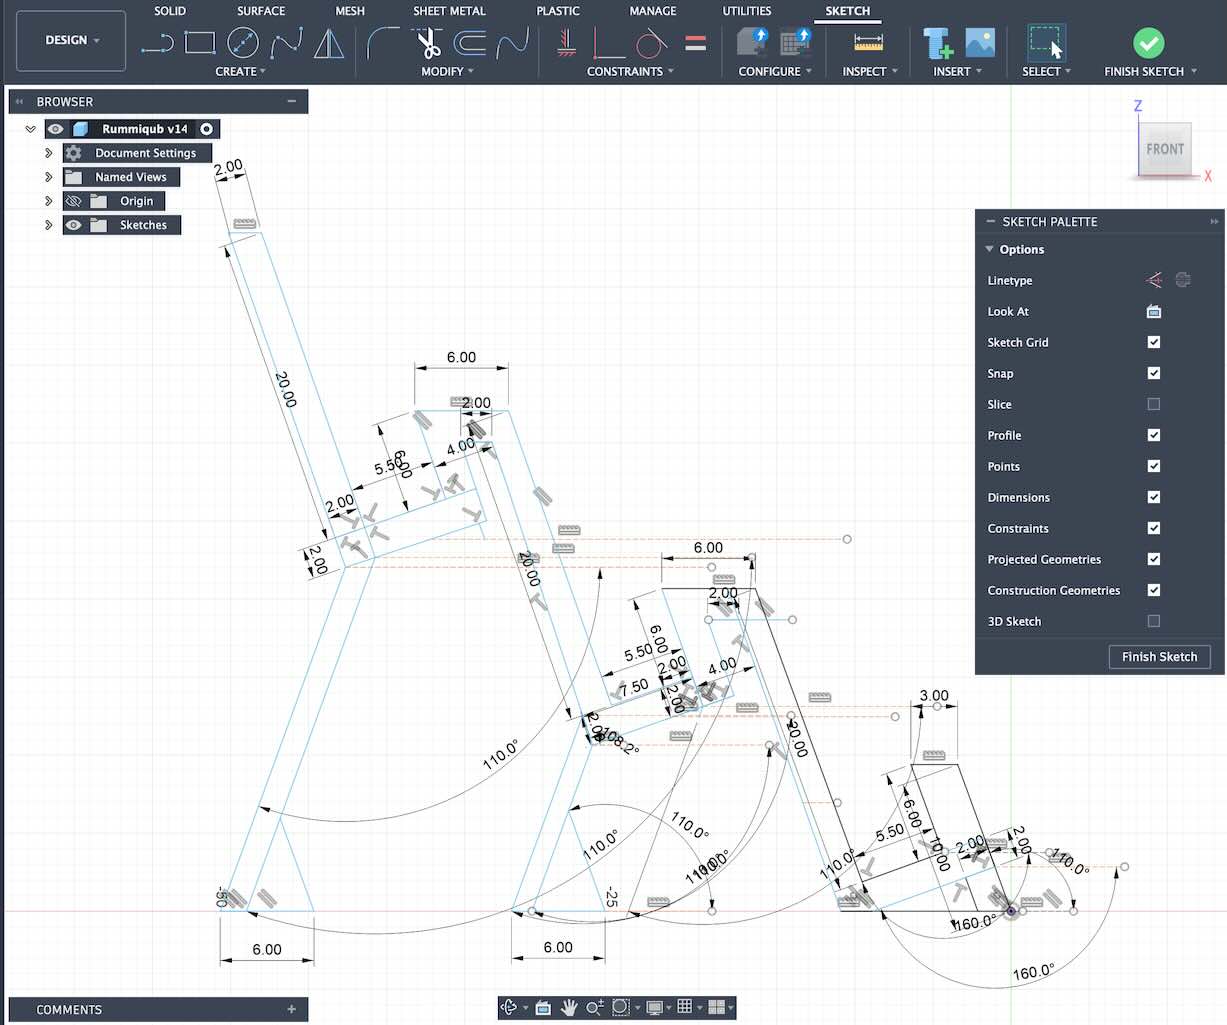
This was one of my first 3d modeling jobs in Fusion and so the sketch is somewhat messy. However, the design approach worked out reasonably. First, the goal was to draw the side profile of the tray like this:
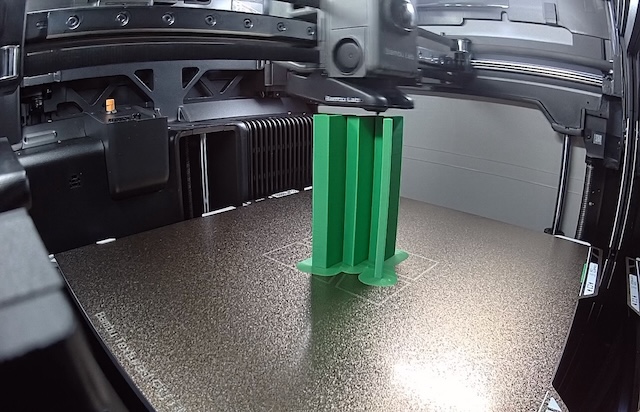
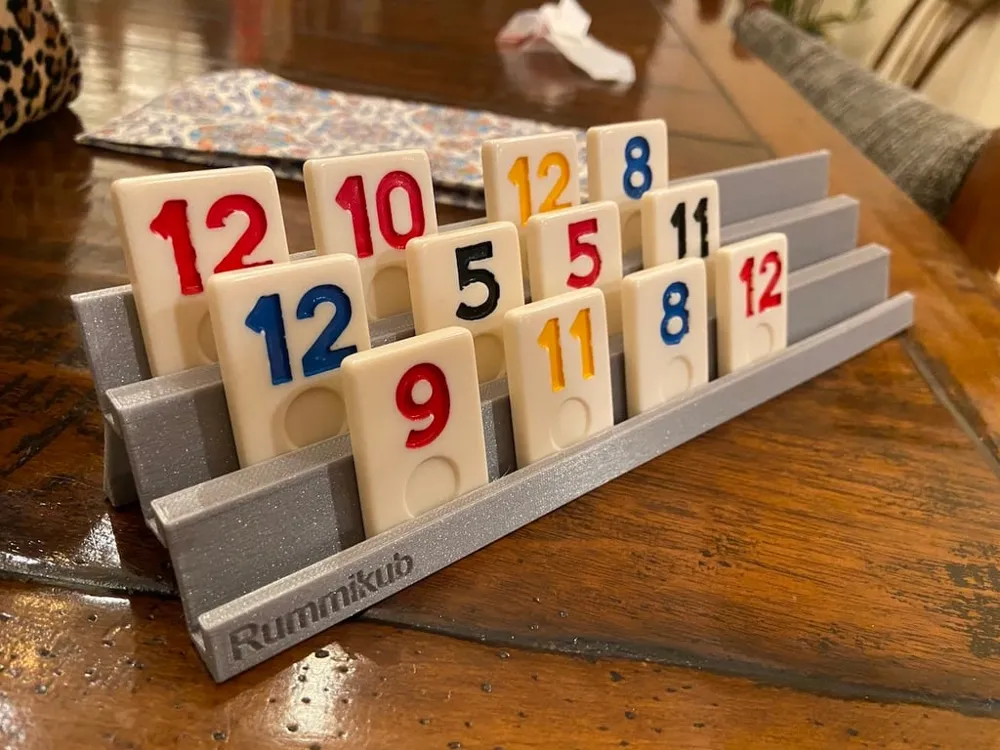
Then, the design was iterated on by printing “one tile wide” extrusions of the tray profile to refine the spacing, ease of grabbing and inserting the tiles, tray stability, etc. Once the profile was optimized, it was extruded to 10 tile wide (about 235mm) and a set of 4 were printed for the family.
Printing Considerations
the natural way to print this would be on-end so that no supports were required. However, I was initially printing this on a Prusa i3 MK3S which has a build volume of 250mm x 210mm x 210mm, so I had to print it horizontally on the bed. The design is relatively trivially supported by either standard or tree-style supports underneath, which were easy to remove. A brim is typically required due to the low contact area of the tray feet with the bed.
A print profile for the horizontal layout with tree supports is available here on my MakerWorld profile. I have verified that a BambuLab H2S has no problems printing this model in this orientation, or on-end given its larger build volume.